Wall Framing Basics
Before I begin on the basics of wall framing
I’d like to tell you a little story about a fellow carpenter. First
I’ve worked with this guy since high school, you will not find a better
carpenter when it comes to framing. This guy carries the biggest headers, fourteen studs at a time, just don’t ask him to get on top of the wall plate.
If he does happen to get on top of the wall he won’t hardly
move and the whole building is shaking. Anyway he has worked all over the
country including, California, Colorado, Washington, to name a few but he always ends up back here in northern Illinois.
The subject always comes up, who is better and faster? He refuses to single
out any one place saying this one is better at one certain thing and
this one at that and it’s still just, wall framing, roof framing, floor
framing,
studs, plates, headers, joists, and sheathing. The point I’m trying to
make is, all carpenters do it different, so if it works well how could
it be wrong.

Preparation
By the time you get to the job site in the morning you should already have an idea of where you will begin framing
walls, header list, where to locate studs, etc. I like to have one
carpenter start on headers, corners, and window packages etc.
Headers
Headers
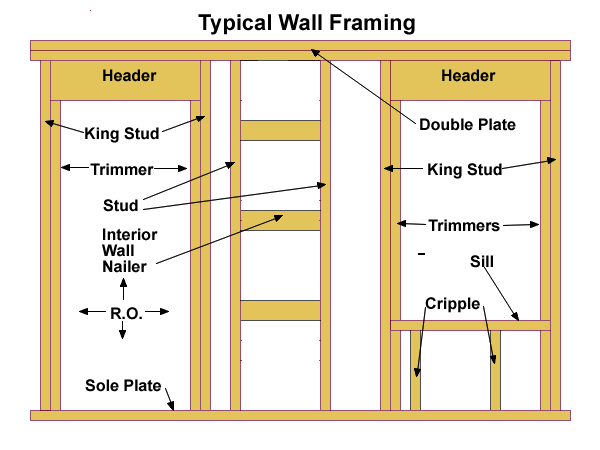
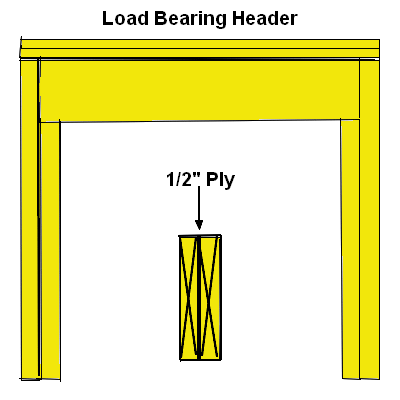
(called lintels by architects) run horizontally over the top of door
and window rough openings and support the weight of floor joists,
ceiling joists, and rafters from above. Each header has a king stud
(full length) nailed to either end and a cripple (trimmer) nailed under
each end unless the header is over five feet long then the cripple is
doubled up.
The standard height of door and window headers is 6′ 10
7/8″, this could vary so make sure you check your plans carefully. Sliding patio doors are usually 2″ lower so you could hold the header down on the studs to the correct height.

Rough Openings
In normal wall framing rough openings for windows will be found on a separate sheet called the window schedule. To obtain the window header size
simply add 3″ to the rough opening width and this will be your header
length.
Door headers are 5″ bigger than the callout on the door, so if
the print calls for a 2/8 door
the header is 3/1. As before sliding glass doors are different and these
rough openings can usually be found on the window schedule. Wrapped or
pass through openings should be made one inch bigger than the call out,
so the header is 4″ bigger.
Cripples
Many carpenters cut cripples out of pre cut studs which I consider a
waste of lumber. If you leave interior door cripples out until it is
time to do back-out its easier to cut the doorways out with a skil saw. I
like to use 14′ braces on 8′ walls, then use them for cripples on
interior headers. Standard interior trimmers are 6′ 9 3/8″ X 2 = 13′ 6
3/4″ = less waste and more profit.
Corners
In my opinion there are only two different ways to make outside corners
L-shaped (California corner) or stud block stud (old world way). The
California corner is the only way to go for many reasons which will be
discussed in a later page entitled advanced framing (optimum value engineering).

Wall Intersections
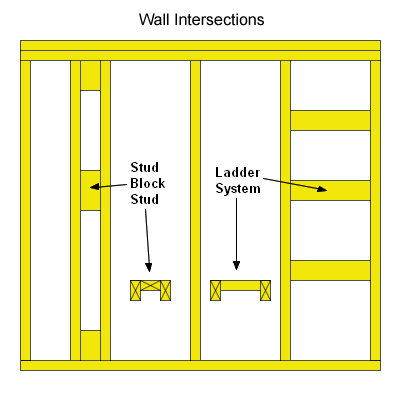
In wall framing where two walls intersect is always another point of
discussion amongst framers. Below are two generally accepted ways of
getting the job done.

Links to Related Carpentry Pro Framer Pages
|
|
|